
How to Upload Files to Any Cloud Storage Platform Using express-file-wizardry in Express.js
FIle upload made easy


Table of contents
- Outline
- Let's Get Started
- Prerequisites
- Introducing express-file-wizardry: Your Ally in File Uploads
- Why a new package?
- STEP 1: Setting up your Express Application
- STEP 2: Setting up Preferred Cloud Storage
- STEP 3: File Upload Routes and Middleware
- Advanced Features and Customization
- Bringing Everything Together and Testing
- Conclusion
- References and Further Reading
File upload is a crucial aspect of web development enabling users to move files from their device to a server, necessary for various uses like profile picture uploads or submitting online forms.
To ensure secure and dependable storage of uploaded files, integration with cloud storage providers such as Amazon S3, Google Cloud Storage, Cloudinary or Microsoft Azure Blob Storage is often preferred, although the process can seem daunting to you.
Fret not! This article will guide you through integrating with these cloud storage platforms.
Outline
Let's Get Started
Prerequisites
Introducing express-file-wizardry: Your Ally in File Uploads
Why a New Package?
Setting up Your Express Application
Setting up Preferred Cloud Storage
File Upload Routes and Middleware
Bringing Everything Together and Testing
Advanced Features and Customization
Conclusion
References and Further Reading
Let's Get Started
Welcome to my comprehensive guide on mastering file uploads and integrating them seamlessly with various cloud storage platforms in your web applications. Whether you're a junior developer navigating the complexities of file uploads or an experienced developer looking to streamline your workflow, this article is here to assist you every step of the way.
After reading this article, you will have the information and self-assurance to incorporate strong file upload features into your applications.
Prerequisites
Basic knowledge of JavaScript and Node.js - Familiarity with JavaScript and Node.js is essential to understanding the concepts and code examples in this tutorial.
A Cloud storage platform account - set up any of the cloud storage express-file-wizardry supports
Introducing express-file-wizardry: Your Ally in File Uploads
express-file-wizardry is a middleware for Express.js that empowers developers to effortlessly handle file uploads in their applications. With its intuitive interface and robust feature set, express-file-wizardry abstracts away the complexities of file handling, allowing developers to focus on building innovative solutions without getting bogged down by boilerplate code.
Why a new package?
In a filled environment of options for managing file uploads in Express.js apps, you may question the necessity of a new package. The creation of express-file-wizardry came from a specific need that current solutions didn't fully meet.
Flexible Storage Options: express-file-wizardry seamlessly integrates with a wide range of cloud storage platforms, giving you the freedom to leverage the power of your preferred provider.
Versatile File Type Support: from popular formats like JPEG, PDF, and MP4 to lesser-known file types, express-file-wizardry ensures that your application can handle uploads with ease, regardless of the file format.
Simplified Configuration: With intuitive and straightforward configuration options, express-file-wizardry makes it easy to set up and customize file upload functionality to suit your specific requirements.
STEP 1: Setting up your Express Application
Install Node.js and npm
If you haven't already, you'll need to install Node.js and npm (Node Package Manager) on your system. You can download and install them from the official Node.js website: Node.js.Create a New Directory for Your Project
Open the terminal make a new directory and navigate into the directory for your Express.js project. This can be accomplished by using the following command.mkdir file-upload-app cd file-upload-appInitialize Your Project
Initialize your project by running:npm init -yInstall Express
Install Express.js as a dependency for your project:npm install expressCreate Your Express Application
Create a new file, for example, app.js, and write your Express application code:const express = require('express'); const app = express(); const port = 3000; app.get('/', (req, res) => { res.send('Hello World!'); }); app.listen(port, () => { console.log(`Server is running on http://localhost:${port}`); });Run Your Express Application
Run your Express application using Node.js:node app.jsYou should see a message indicating that your server is running on http://localhost:3000.

Test Your Application
Open your API client (Postman or any other one) and navigate to http://localhost:3000. You should see the message "Hello World!" displayed in the response section as shown below.
STEP 2: Setting up Preferred Cloud Storage
Install express-file-wizardry :
npm install express-file-wizardrySet a preferred storage type
  const express = require('express');
  const { FileWizardry } = require('express-file-wizardry');

  const app = express();
  const port = 3000;

  const fileWizardry = new FileWizardry();
  //fileWizardry.setStorageType('memory'); // Storage type can be any of the supported types: memory, disk, cloudinary, amazons3
  fileWizardry.setStorageType('cloudinary', {
      cloud_name: 'my-cloud',
      api_key: 'api-key',
      api_secret: 'api-secret'
  });
  // fileWizardry.setStorageType('amazons3', {
      // accessKeyId: 'your-access-key',
      // secretAccessKey: 'your-secret-key',
      // region: 'your-region',
      // bucket: 'your-bucket'
  // });
  // fileWizardry.setStorageType('disk', {
      // destination: '/path/to/upload/folder'
  // });

  app.get('/', (req, res) => {
    res.send('Hello World!');
  });

  app.listen(port, () => {
    console.log(`Server is running on http://localhost:${port}`);
  });
Understanding the Code:
Importing Dependencies: I start by importing the express framework and the FileWizardry class from the express-file-wizardry package.
Initializing Express Application: Next, I create an instance of the Express application and define the port number (in this case, port 3000) on which the server will listen for incoming requests.
Configuring FileWizardry Storage Type: The FileWizardry class provides methods for configuring the storage type for file uploads. In this example, we're setting the storage type
cloudinarywith its configuration options, which indicates that uploaded files will be stored temporarily in memory. Alternatively, you can uncomment one of the other storage type configurations (memory,amazons3, ordisk) and provide the necessary configuration options to use Amazon S3, or disk storage, respectively.Defining Routes: We define a simple route handler for the root URL
/which sends the response 'Hello World!' when the server receives a GET request to this endpoint.Starting the Server: Finally, we start the Express server and listen for incoming connections on the specified port. Once the server runs, a message is logged to the console indicating the server's URL.
STEP 3: File Upload Routes and Middleware
After setting up express-file-wizardry to use our preferred cloud storage provider, we will create file upload routes and middleware in our Express.js app. This section will explain how to set routes for managing file uploads and incorporate express-file-wizardry middleware for a seamless process.
Defining File Upload Routes
  app.post('/upload-signle', fileWizardry.uploadFile({ formats: ['image/jpeg', 'image/png'], fieldName: 'image' }), (req, res) => {
    // File upload successful
    res.status(200).json({ message: 'File uploaded successfully', file: req.file });
  });

  app.post('/upload-multi', fileWizardry.uploadFile({ formats: ['image/jpeg', 'image/png'], fieldName: 'images',  multiFile: true }), (req, res) => {
    // File upload successful
    res.status(200).json({ message: 'Files uploaded successfully', file: req.files });
  });
In this example:
I defined a
POSTroute/upload-singleto handle single file upload using thefileWizardry.uploadFilemiddleware. This middleware expects a single file with the field nameimage. This middleware takes an options object specifying the allowed file formats (formats) and the field name (fieldName) under which the file will be uploaded.In contrast, the second route
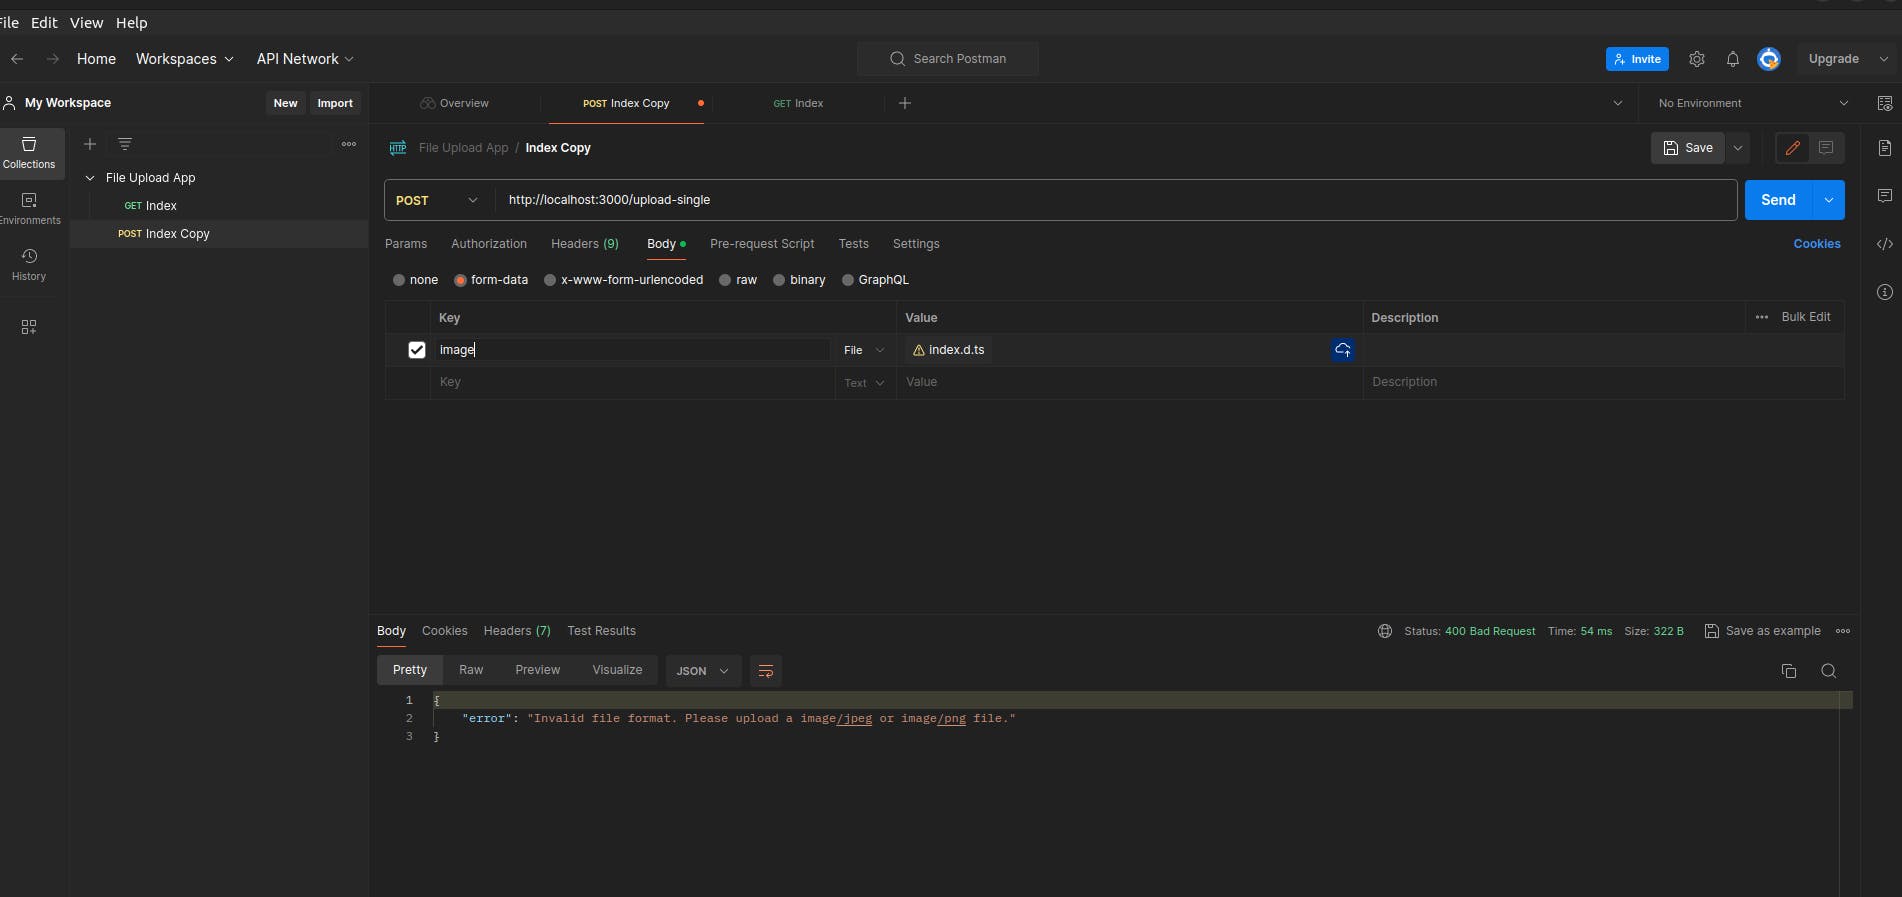
/upload-multiis designed to handle multiple file uploads. Here, thefileWizardry.uploadFilemiddleware is again employed, but with an added option:multiFile, which is set totrue. This indicates that the route can process multiple files simultaneously.Across both routes, I've restricted uploads to only accept JPEG and PNG image files, ensuring that the application remains focused on handling image uploads exclusively.
req.files and req.file otherwiseError Handling and Validation
  app.post('/upload-single', fileWizardry.uploadFile({ formats: ['image/jpeg', 'image/png'], fieldName: 'image' }), (req, res) => {
    if (req.fileValidationError) {
        return res.status(400).json({
          error: req.fileValidationError.message
        });
    }
    res.status(200).json({
        message: 'File uploaded successfully',
        file: req.file
    });
  });

  app.post('/upload-multi', fileWizardry.uploadFile({ formats: ['image/jpeg', 'image/png'], fieldName: 'images',  multiFile: true }), (req, res) => {
    if (req.fileValidationError) {
        return res.status(400).json({
          error: req.fileValidationError.message
        });
    }
    res.status(200).json({
        message: 'Files uploaded successfully',
        file: req.files
    });
  });
Validation Check: After the file upload middleware, a validation check is performed using
req.fileValidationError. If a validation error occurs during the file upload process,req.fileValidationErrorwill be populated with details of the error. Every validation has been handled by the express-file-wizardry package.Error Handling: If
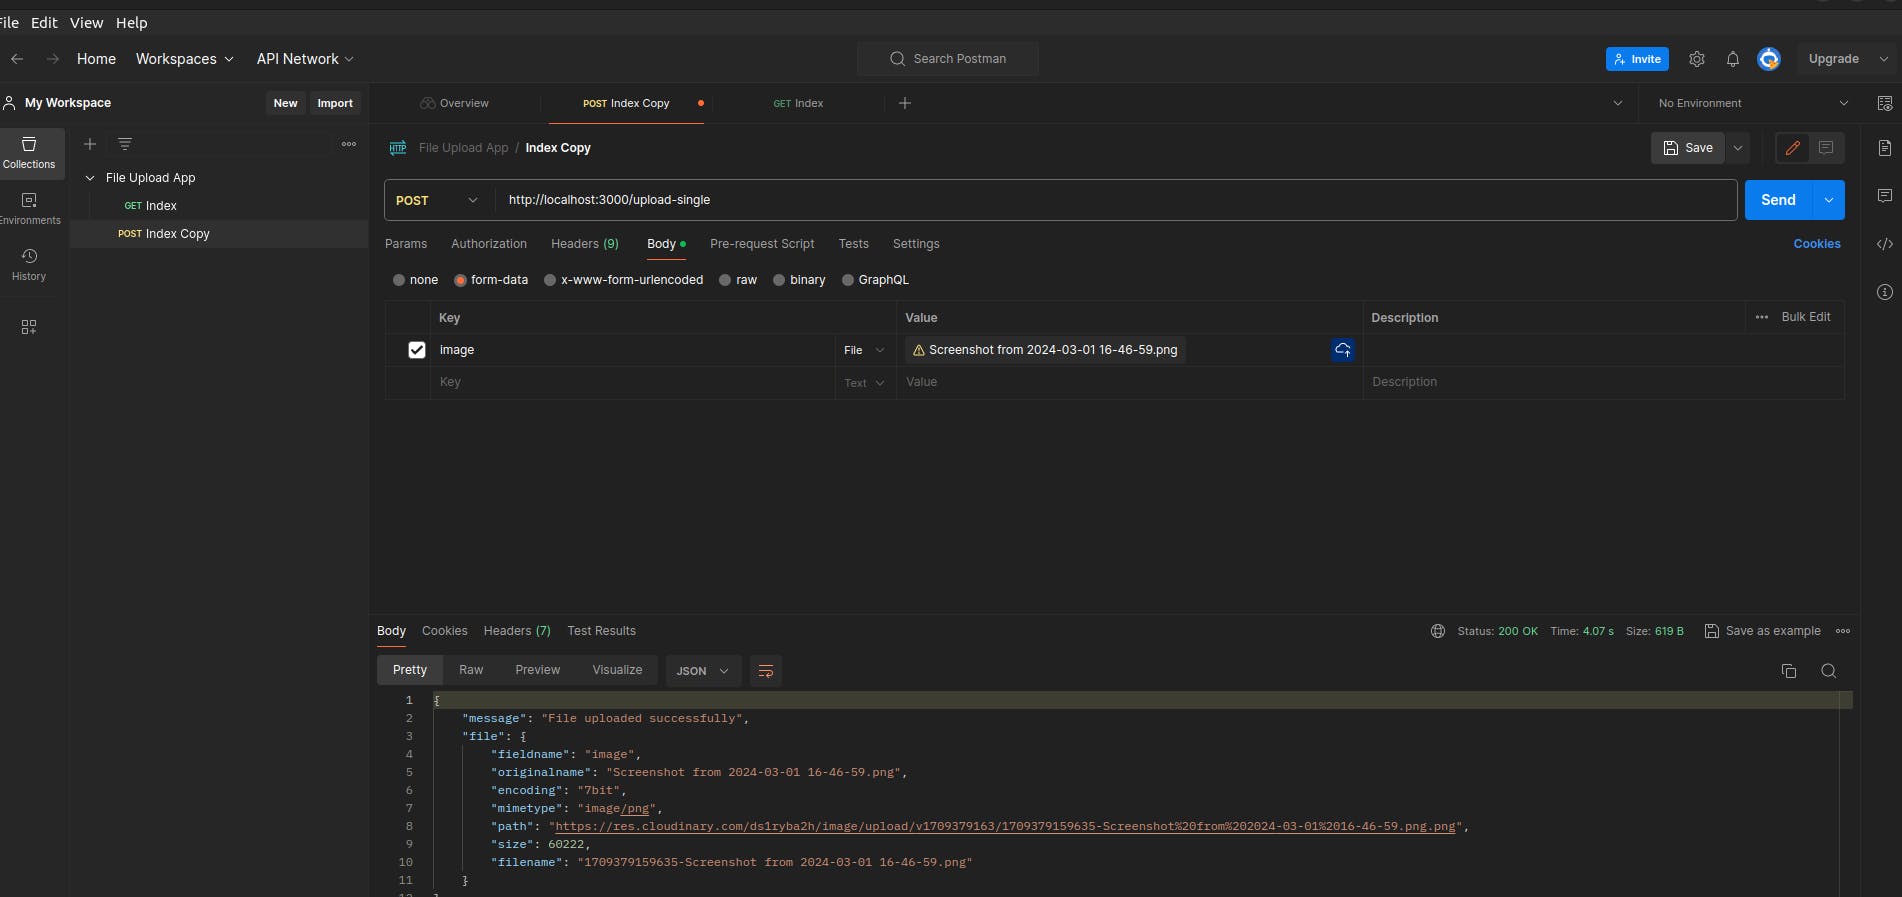
req.fileValidationErrorexists, indicating a validation error, the route sends a 400 Bad Request response with an error message describing the validation error.Success Response: If no validation errors occur, the route sends a 200 OK response with a success message and information about the uploaded file(s)
req.fileorreq.files
Advanced Features and Customization
Max Size Upload Option (Optional)
Maximum allowed size for each uploaded file, in bytes. If specified, files exceeding this size will be rejected.File Deletion
File deletion is an essential aspect of managing uploaded files, especially when dealing with storage solutions like local disk or cloud storage. Here's how you can implement file deletion in an Express.js application using express-file-wizardryconst fileWizardry = new FileWizardry(); fileWizardry.deleteFile('cloudinary', { public_id: 'cloudinary_file_public_Id', }); fileWizardry.deleteFile('amazons3', { key: 'my-file', Bucket: 'my-bucket', }); fileWizardry.deleteFile('disk', { path: 'my-file', });
Bringing Everything Together and Testing
const { config } = require('dotenv');
const express = require('express');
const { FileWizardry } = require('express-file-wizardry');
config();
const app = express();
const port = 3000;
const fileWizardry = new FileWizardry();
fileWizardry.setStorageType('cloudinary', {
cloud_name: process.env.CLOUD_NAME,
api_key: process.env.API_KEY,
api_secret: process.env.API_SECRET,
});
app.get('/', (req, res) => {
res.send('Hello World!');
});
app.post(
'/upload-single',
fileWizardry.upload({ formats: ['image/jpeg', 'image/png'], fieldName: 'image' }),
(req, res) => {
try {
if (req.fileValidationError) {
return res.status(400).json({
error: req.fileValidationError.message || req.fileValidationError,
});
}
res.status(200).json({
message: 'File uploaded successfully',
file: req.file,
});
} catch (error) {
console.log(error);
res.status(500).json({
message: 'Internal server error',
error: error.message,
});
}
}
);
app.post(
'/upload-multi',
fileWizardry.upload({
formats: ['image/jpeg', 'image/png'],
fieldName: 'images',
multiFile: true,
}),
(req, res) => {
try {
if (req.fileValidationError) {
return res.status(400).json({
error: req.fileValidationError.message || req.fileValidationError,
});
}
res.status(200).json({
message: 'Files uploaded successfully',
file: req.files,
});
} catch (error) {
console.log(error);
res.status(500).json({
message: 'Internal server error',
error: error.message,
});
}
}
);
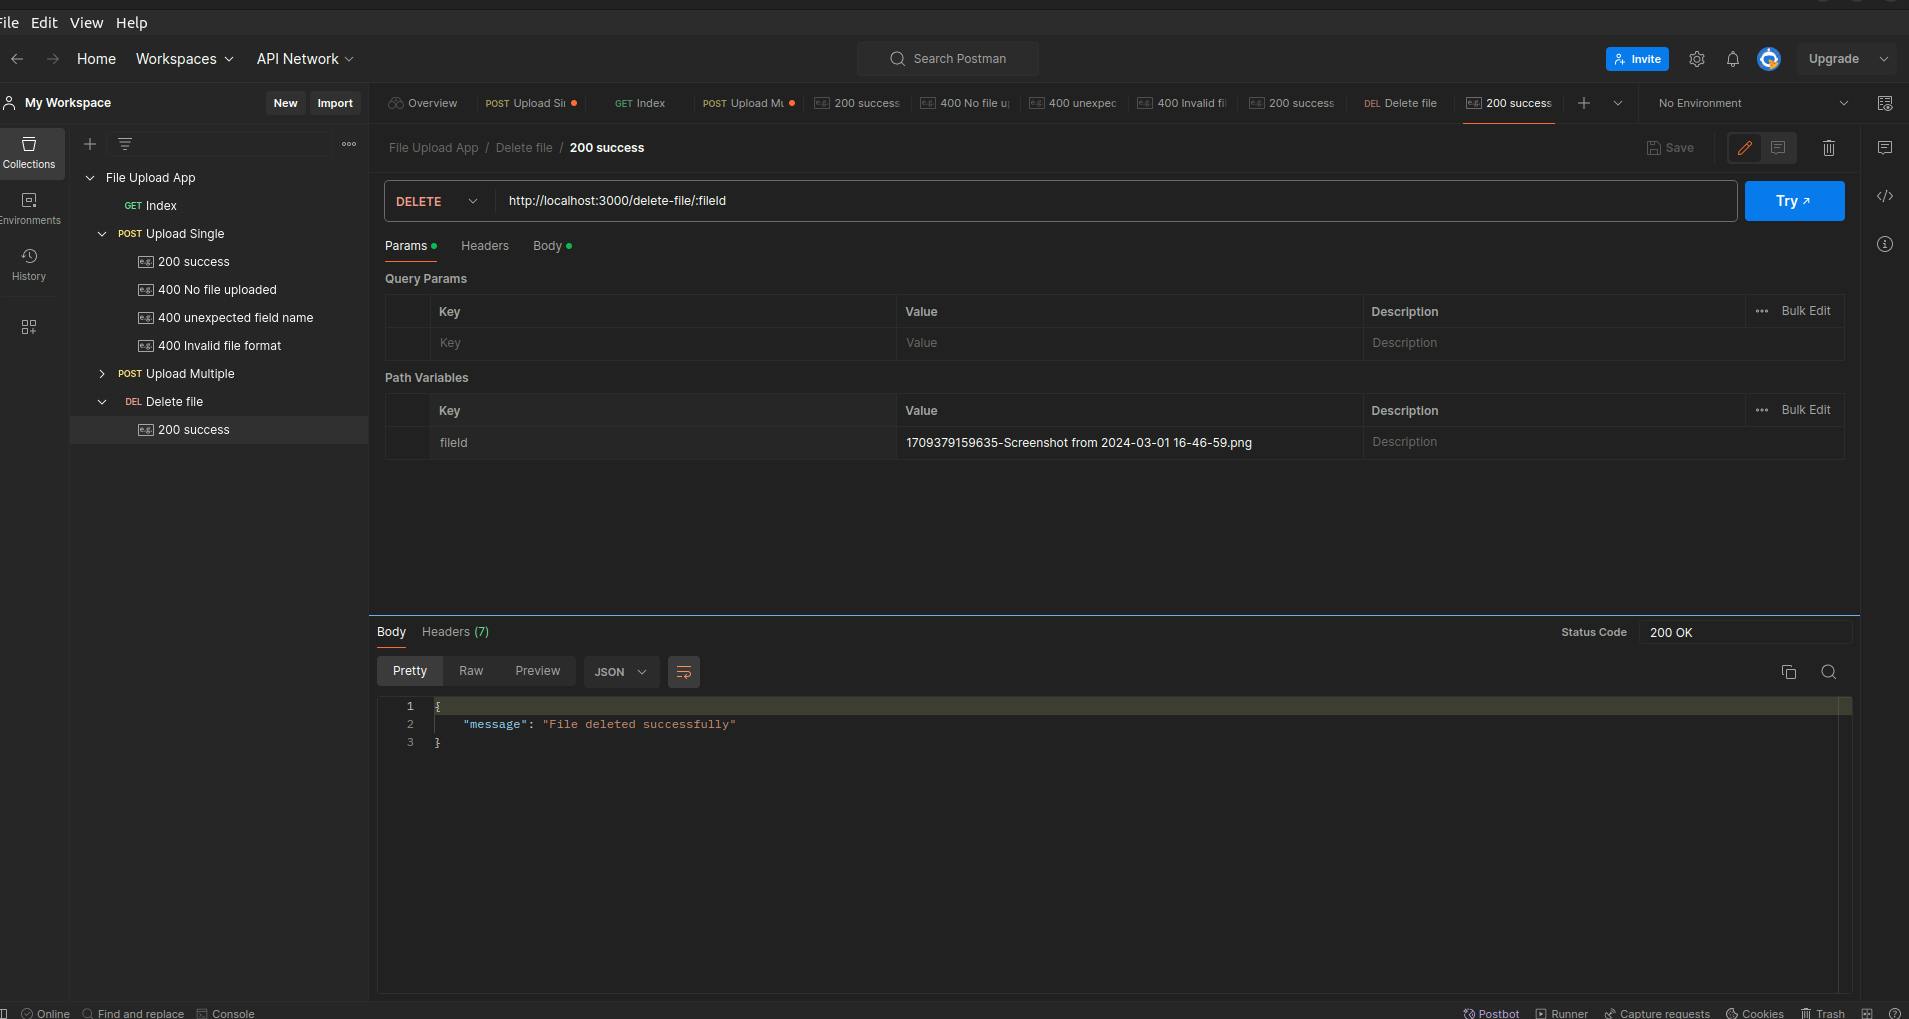
app.delete('/delete-file/:fileId', async (req, res) => {
try {
await fileWizardry.deleteFile(req.params.fileId);
res.status(200).json({
message: 'File uploaded successfully',
file: req.file,
});
} catch (error) {
console.log(error);
res.status(500).json({
message: 'Internal server error',
error: error.message,
});
}
});
app.listen(port, () => {
console.log(`Server is running on http://localhost:${port}`);
});
API keys, credentials, and other configuration variables in environment variables. You can use packages like dotenv to load environment variables from a .env file. Ensure that the .env file is added to the .gitignore file to prevent sensitive information from being exposed in version control.Start your Express.js application by running the following command in your terminal:
node app.js
Once the application is running, you can now test your application by sending requests to the defined routes (e.g.,
/upload-singlefor single file upload,/upload-multifor multiple file uploads and/delete-file/:fileIdfor file deletion) using your preferred API client.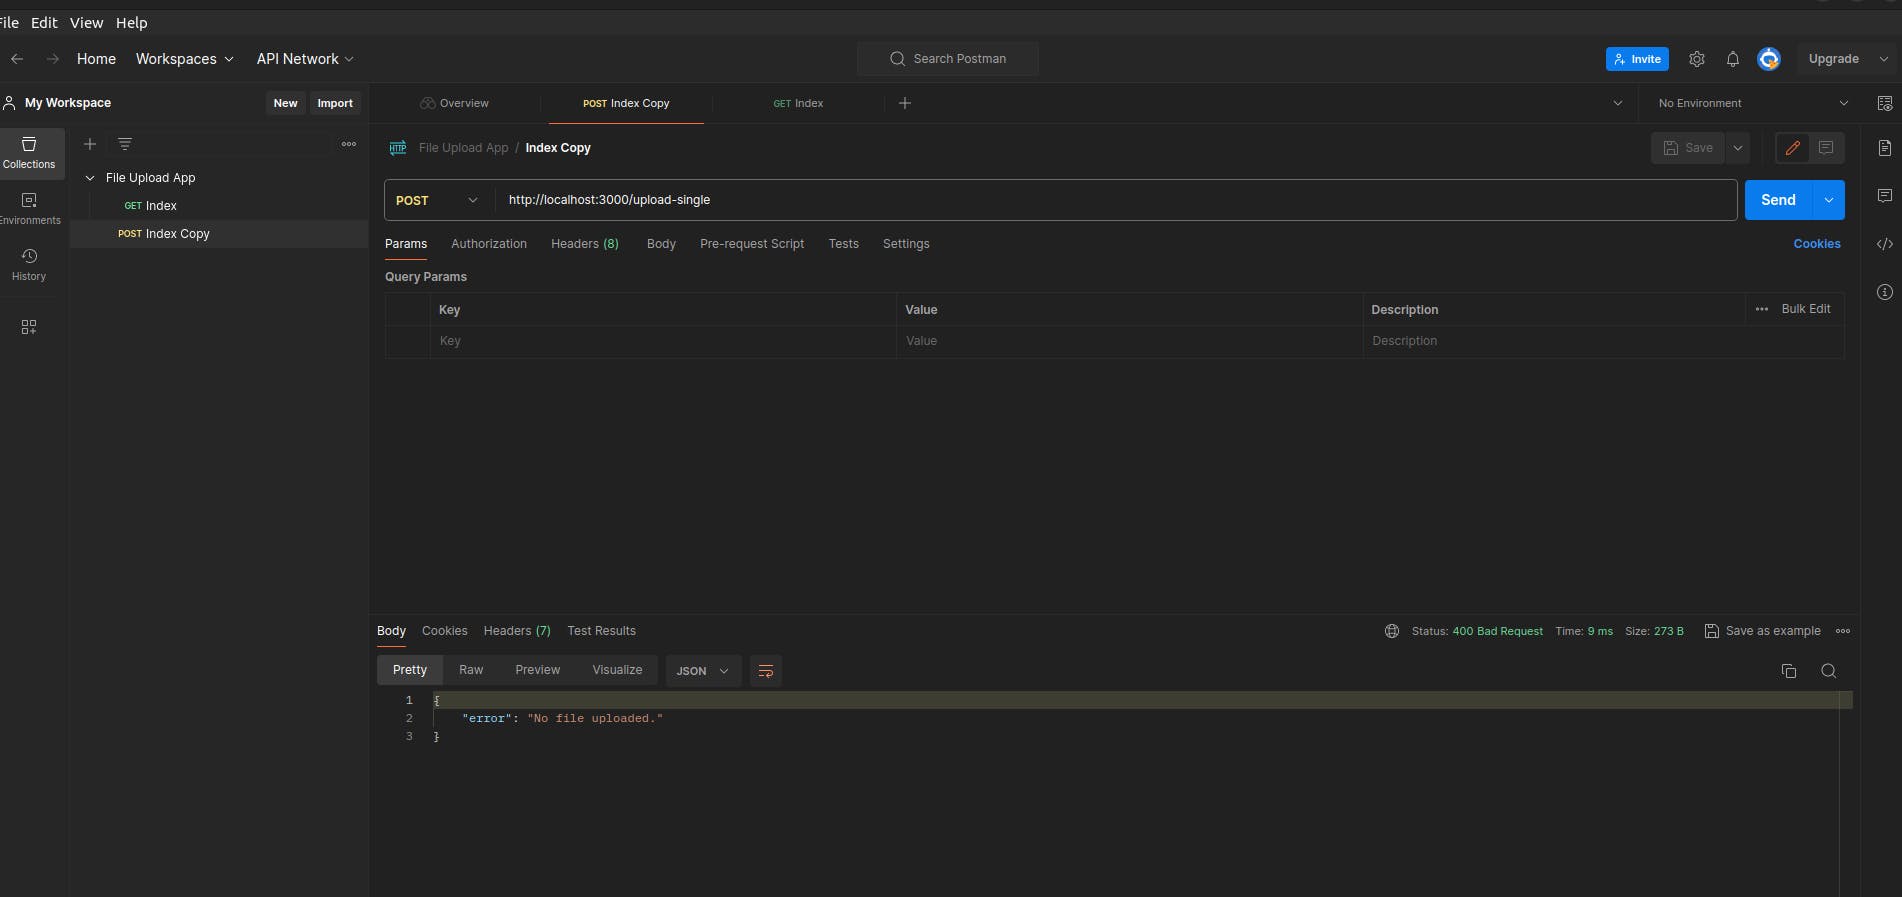

Monitor the terminal for any logs or errors that may occur while your application is running. If there are any issues, you can debug them based on the error messages displayed.
You can click here to check out the complete code on GitHub.
Conclusion
This article delves into the integration of file upload features in Express.js using express-file-wizardry, addressing the importance of this function in web development, challenges, and the tool's benefits. The guide covers setting up an Express.js app for file uploads, configuration of cloud storage options, defining routes, error handling, security practices, and advanced customization. express-file-wizardry streamlines the file upload process, boosting performance and user experience. It supports local disk, cloud storage like Amazon S3, and third-party services, offering a comprehensive solution. Overall, it enables developers to focus on creating robust apps without the hassle of managing file uploads.
Happy Coding!